I’m just going to say it.
I didn’t want to do this project. Nope. Nada. Didn’t.want.to.at.all.
How to Tile a Shower Surround and the floor in the master bath was not a blog post I intended to write?
However, now that it is done I am one happy girl. Good thing I don’t make all the decisions. 😉 #myhusbandrocks
The original plan in our master bath was to order a 6′ tub/shower surround, use LVT (luxury vinyl tile) flooring, and refurbish a dresser into a bathroom vanity complete with a vessel sink. Like a couple of those plans came to pass. Ha!
When building a home flexibility is key.
This was a hard concept for me to grasp the first 200 times there was a delay or problem or “issue”. Good thing I had 4, 739 more times to take a go at it. 😉
Okay, now I’m going to let my handsome husband take you through the process of How to Tile a Shower Surround. Yay for home projects!

First things first- this can be fairly labor intensive and you should allow yourself plenty of time to tile your bathroom. Be patient with yourself and the wifey (or your hubby).
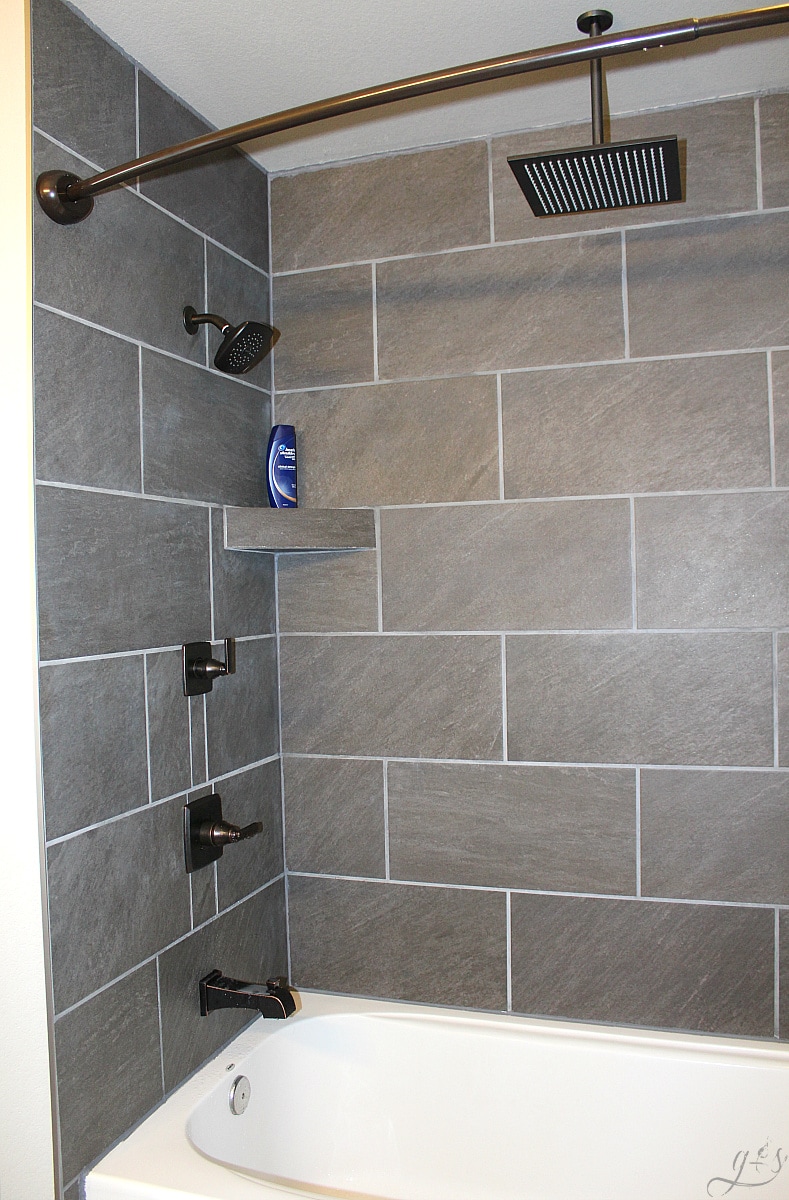
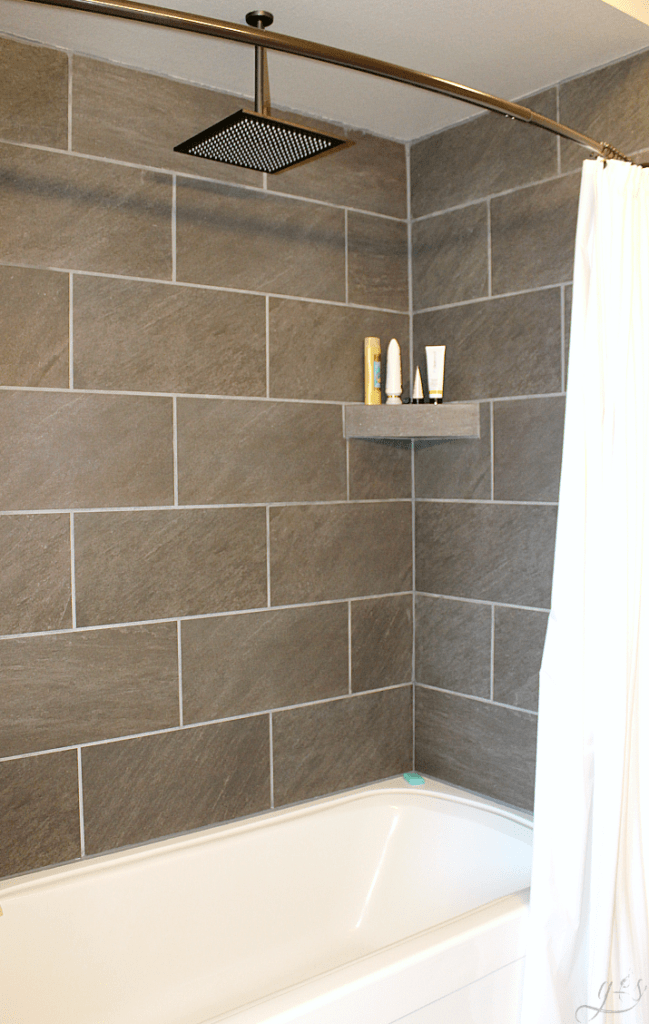
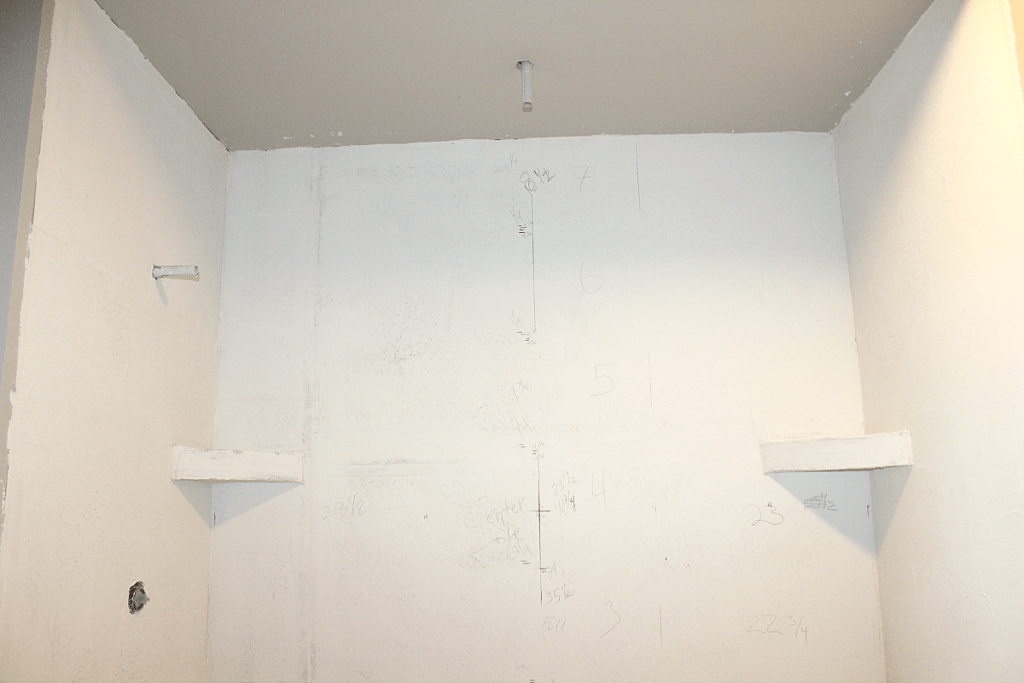
The photo above is the only “before” pic we have of the studs. We used 1/2 inch cement board for the shower surround walls and ceiling.
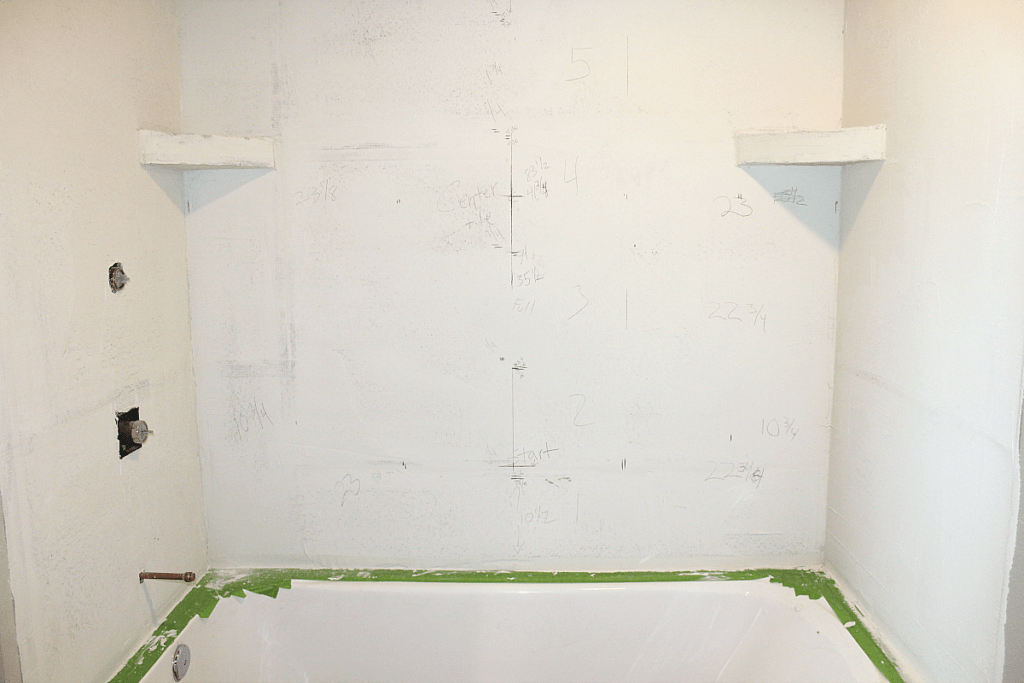
Skim coat the walls and shelves with mortar. Be sure to skim coat all the way down to your tub. We also put tape, plastic, and cardboard on the tub to protect it from damage. The mortar gets everywhere and is pretty gritty. It can scratch your tub so be careful!
I used a laser level to get everything level and centered. This laser rotates (see in photos below) so you can see the line on all three walls. That will help you get and keep your tiles all on the same line and where they meet in the corners.
We decided to make shelves on our own. It was 2×4 material when studs were bare then covered with cement board and skim coat as well. We had randomly picked a height for the shelves which wasn’t smart, no measuring was done, other than what felt comfortable standing in the shower.
Technically, the shelves are a perfect height if you are 6’1″, but at 5’3″ Sam thinks they are a little high. However, she will be the first to tell you they are mighty easy to clean because no water or soap residue touches them.
So in the end, we have decided it was actually a good thing she wasn’t there when my friend and I were determining that little detail. You’ll also see it worked out perfectly because the top edge of the shelf lined up with the tile line.
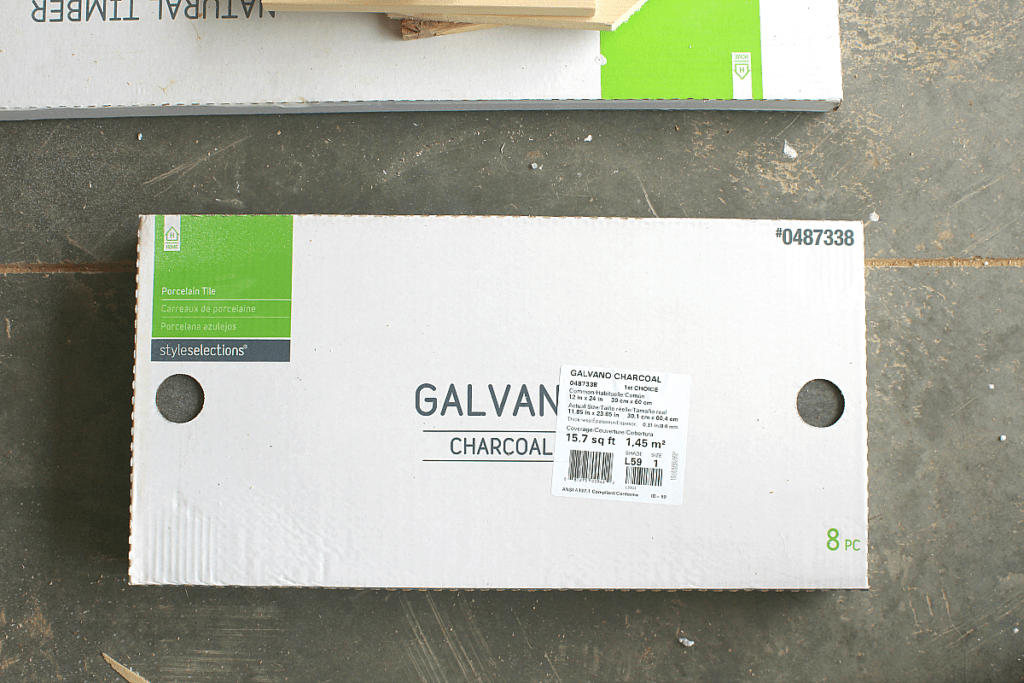
Just in case you want to purchase this tile too, here is a photo of our Galvanized Charcoal tile from Lowes. We used a nice big tile on our walls, 12 in x 24 in. Make sure you get mortar that corresponds with the size of tile you’re using.
You will need mortar for large heavy tiles (apparently there is a difference in mortar). This will ensure your heavy tile adheres to the wall right and stays where you put it.
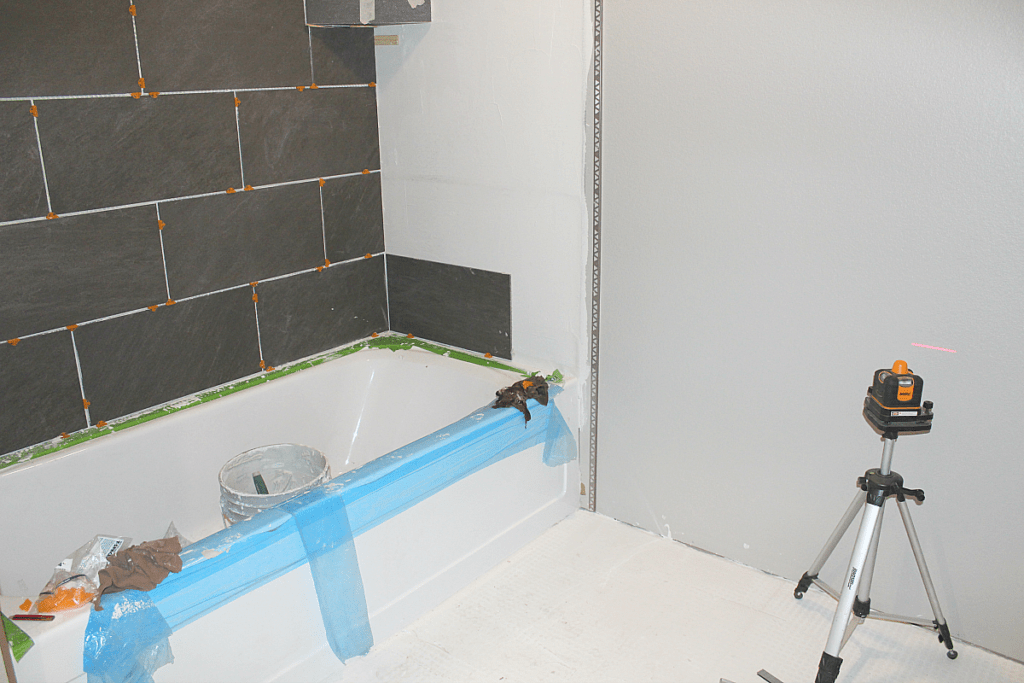
Finally, you can see the laser lever here in use. This tool comes in handy when building a home, let me tell ya! Be sure that your first row starts off as level as possible, fill in gaps and uneven spots or imperfections from you tub. Our tub was new and set up well so we had very little imperfections to deal with, but we did have to shim a few tiles to achieve a straight line on the first row.

Layout is very important. You will want to have equal cut pieces on both sides. So you’ll have to do a little math. When you do this don’t forget to include the size of you spacers, we used 1/4 inch.
DO NOT mix your whole bag of mortar when you start!
There is some timing that needs to be taken into account here. You don’t want to mix so much that it gets hard by the time you get to the bottom of you bucket. I used a 1/4 inch notched trowel to apply grout to both the wall and the tiles.
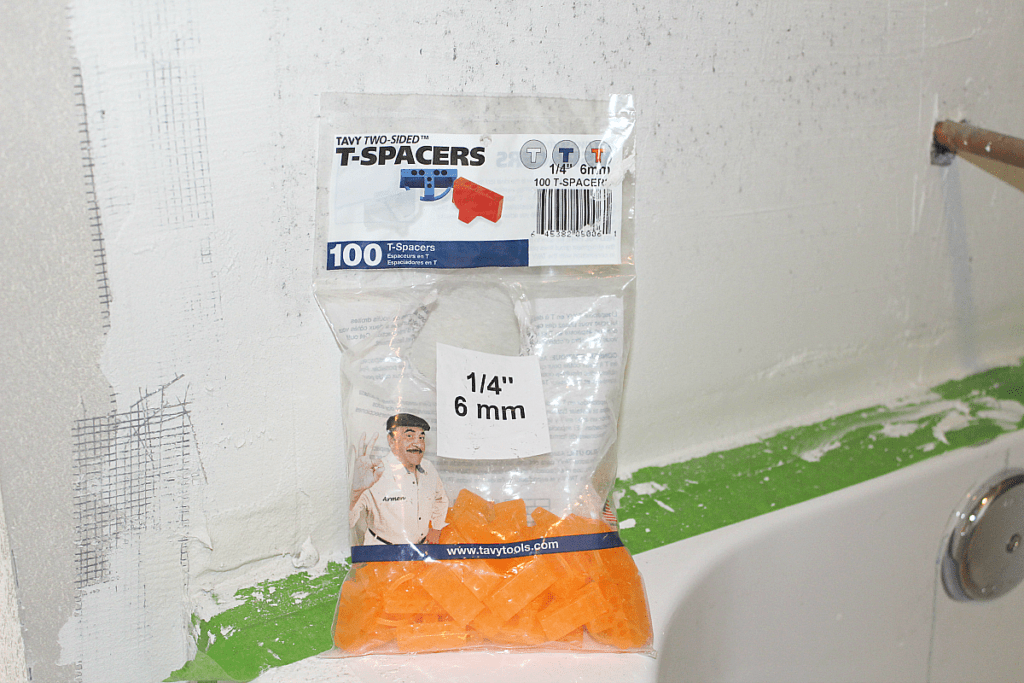
Above are the 1/4 inch spacers we used. Though you can use any size, we used this size to compliment the larger tiles.
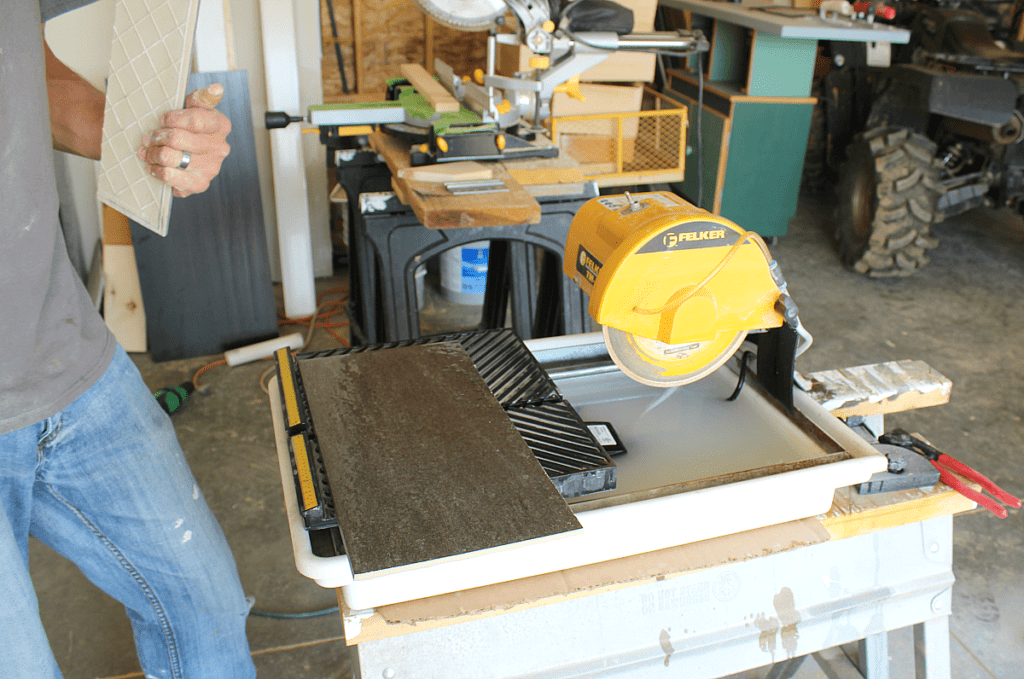
Be sure to use a tile saw that fits the tile your cutting. This saw was almost too small, but we made it work. Be patient with tile cutting, don’t force it, if it’s cutting slow just let it do it’s thing or change the blade. You’ll be sorry if you rush it and chip the edges. That’s always fun. Not!
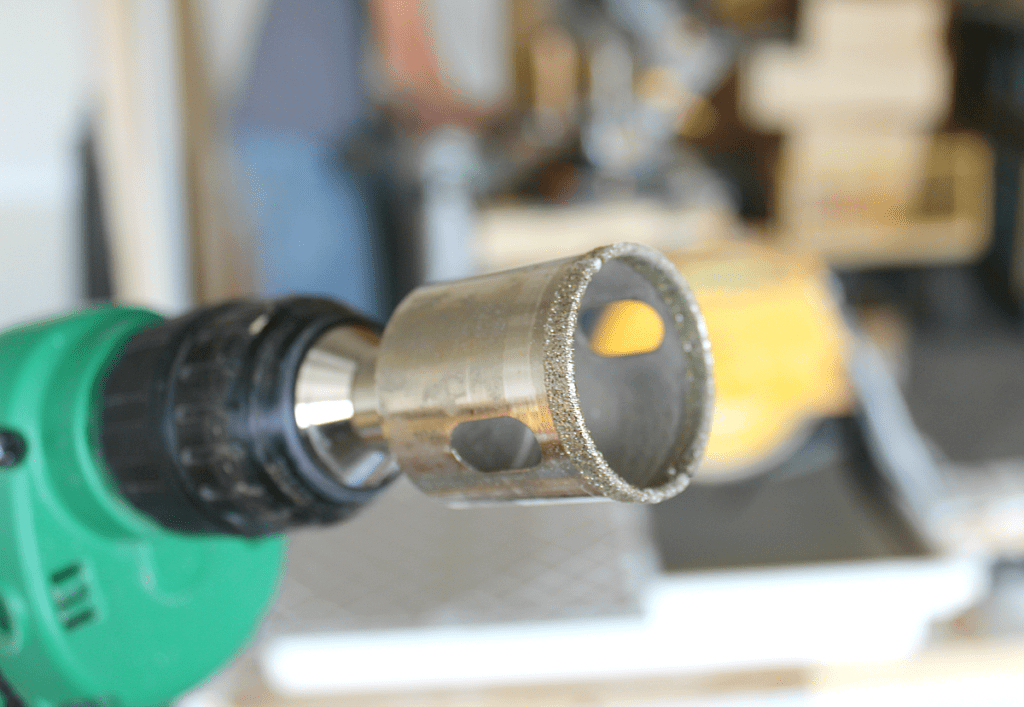
Next, you will need something to make a hole in the tiles for valves and spouts.
This was a handy little kit that sticks on tile and guides the bit down in one spot.
Pictured here is the adhesive bottom, easy on and easy off.
The kit came with extra double sided sticky thingy’s.

Make sure your tile is nice and dry before attempting to stick the cup on. Fill the cup with water and your makin’ a hole!
Be sure to be careful of water and electricity, I hear they don’t mix!

Do some measuring where the hole is supposed to be. I placed the cup on the face or finished side of tile to make sure not to spall or chip the finished side.
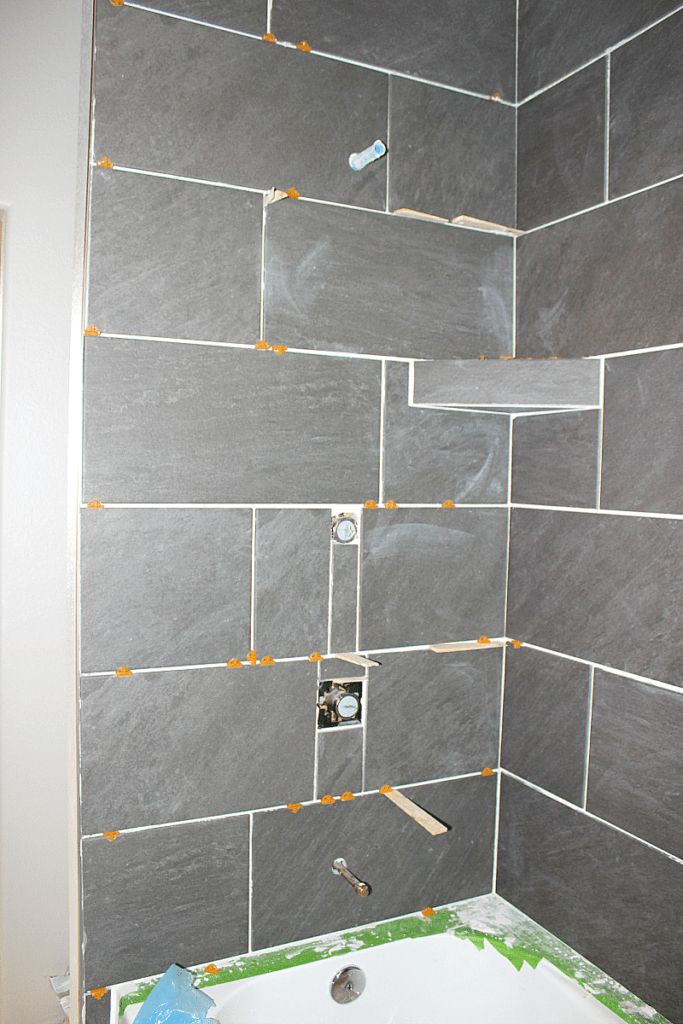
We decided to cut some tiles and also drill holes in some tiles for the valves and spouts.
^^^^^I (the wife) need to add a little detail here…We broke SO many tiles after attempting to make the larger holes that we gave up, accepted the fact we are not professionals, don’t have all their knowledge, tricks, and tools, and moved on with our lives. Ha!

We chose a sanded grout from Lowes in Pearl Gray. Remember to grout only in between tiles, not the areas between the ceiling and tile, or tub and tile. You need to use the same color caulking (Pearl Gray) as your grout to do those areas as you don’t want your grout to crack over time. This ready-to-go tube of grout caulking allows for expansion and looks just like the mix-your-own bag of grout pictured above.
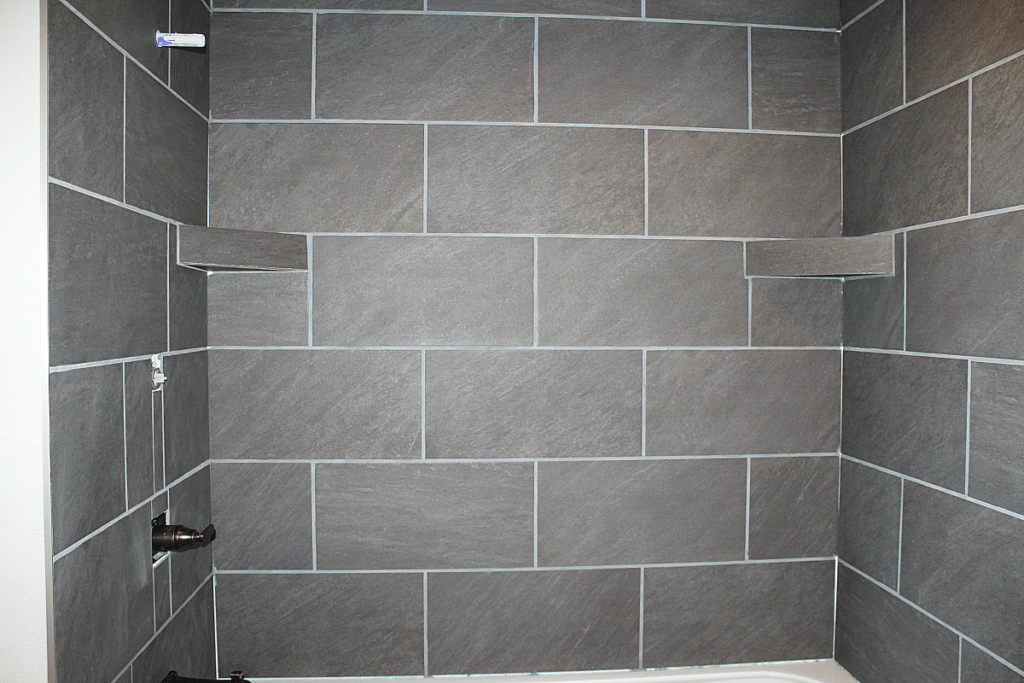
After all the grout has dried, be sure to seal your grout with a grout sealer. Sam did two coats. We then assembled our trim on the valves and called it good! Our Delta fixtures, diverter & rainfall shower head were all ordered from Amazon and we have been quite happy with them.

I love this project, love that you shared it, and I’m so glad that my husband and I were able to complete it. Next up in our remodel are the cabinets but I think that we’re going to go with a professional refinishing service called N-Hance of Fort Wayne haha Thank you so much for sharing though Sammi. Our shower now looks amazing!!
That’s wonderful! I am so glad we could help you with your remodel. Many blessings to you. 🙂 PS…We have friends in Fort Wayne.
Hi, I have a question. My contractor used the wrong color grout on my bathroom porcelain wood plank floor. He used a light color grout which now defines each reclaimed looking plank. Is there any way to correct this and put the darker color grout in. He mentioned a grout dye marker. Is this a good idea? Or do i have to live with the light grout? Barb
Hi Barb,
Shoot! I am so sorry you are unhappy with your grout. We do not have experience with removing grout or a grout dye marker. However, here are a few options that might be helpful:
https://www.youtube.com/watch?v=9QwXrppyvOc (grout stain)
https://www.houzz.com/discussions/5441849/contractor-used-wrong-color-grout-can-it-be-fixed
https://www.crazy-wonderful.com/how-to-fix-wrong-grout-color/
Good luck Barb and thank you for taking the time to leave your comment. Let us know how you fixed it! 🙂
This may be an odd question.. haha. I am in the process of planning to remodel my bathroom. I LOVE the large charcoal grey tile, like you used. I am having a hard time making decisions on everything for I am super indecisive. HAHA! My question is I am wondering what flooring you have to go with the large charcoal grey tile in the shower. I have been searching and searching on Pinterest and other medias to find something I like but I can’t find any pictures of quite what I am looking for. Just looking for another opinion and open to ideas 🙂 Thank you!
Hi Katie! It’s totally normal to be indecisive. It’s a lot of money and a lot of work and fairly permanent. 😉 Here is our floor tile that we chose to go with the shower tile: https://happihomemade.com/how-to-tile-bathroom-floor-plank-tiles/ Thanks for the questions and we wish you all the best! Let us know if we can help with anything else. Blessings!